
How to Set Up a Django and React SaaS Boilerplate: A Step-by-Step Guide
I'll be using this boilerplate and adding to it so others can use, while building in public!

Lover of coding, software development/engineering, indie hackers podcast/community, start-ups, music, guitar, technology, fitness, running, biking, learning new things, travel, the beach, and hiking/mountains.
As a kid I had too many interests. I grew up playing soccer from an early age and played through college! Sports and being a part of a team was always part of my DNA. Not only did I value sports and competition but I loved music, art, drawing, animation, film, computers, math, and learning.
Once I hit college, the decision to choose my life path was paralyzing, and ultimately led me down many different paths. I explored economics, finance, psychology, philosophy, statistics, communications, and marketing. I graduated with a finance degree and thought the data science, statistics, and the trends and patterns would be a fun career, however my first entry level job in the industry discouraged me to continue in the industry and to explore other paths.
I always had an itch to build and start something on my own or with family. Growing up I started a lawn mowing business, shoveling business, lemonade stands, and small Wordpress websites. I loved the creativity of coming up with ideas on how to help people and make money at the same time.
I realized I loved technology, and seeing what could be created and started with technology really urged me to start down the path of learning how to code. My brother and I had an idea for a college social network (similar to Facebook), geared solely towards education and only for students at your college. We wanted to give students the ability to meet people on campus, finding work, organize course material, share notes and materials, find extracurricular activities, sell textbooks and furniture. I took it upon myself to learn how to build something like that. Basically taking an idea and making it happen. I learned about software development, coding languages, web frameworks, startups, marketing all on my own.
I took online free courses, watched videos and tutorials about Django, Python, Javascript, HTML, and databases. I absolutely loved everything about the process. Seeing my work come to life and seeing people use what I created. It satisfied everything that I enjoyed growing up. The creativity, the design, artwork, coming up with a business, learning new things at my own pace, however I learned best, and working with my brother. I did all this while working full-time at a financial institution during my nights and weekends.
We finally launched StudentGrounds, however after a year and 200 user signups later it slowly died down. This experience of taking an idea and learning everything needed to make it a reality basically propelled my interest in learning how to code and do that full time. I learned all about computer science, taking a certificate course at night at a local university. I started another project idea on the side for an event management application for my father's youth soccer tournament, and started applying to every technology company I could think of. I ultimately got my first software engineer job at a small start up in Boston as an apprentice/intern and learned on the job before getting my first full-time software engineer position at a large Boston e-commerce company. My goal there was to learn as much as I could from season professionals, and learning how the corporate world works in terms of software development.
My ultimate goal is to create something on my own doing something I love, as well as enjoy life, and give back to others through education.
Right now I am a full-time Software Engineer with 6 years in the marketing tech space, trying to finish a SaaS boilerplate so that I can spin up any web application for any idea at the click of a button, which will then set me up for my next idea, IdeaVerify, an automated way to verify/validate you're SaaS application idea before actually starting to code and wasting many hours and years developing something that no one would use.
This blog is about my journey navigating the software engineering world, without a CS degree, building in public, keeping record of what I learned, sharing my learnings and at the same time giving back to others, teaching them how to code and giving helpful hints and insights. I am also using this blog to showcase other sides of me such as art, music, writing, creative endeavors, opinions, tutorials, travel, things I recently learned and anything else that interests me. Hope you enjoy!
Starting a Software as a Service (SaaS) project can be daunting, especially with the initial setup of the infrastructure. Luckily, with the right boilerplate, much of the groundwork is laid out for you. This guide will walk you through setting up a SaaS application using a specific Django backend and React frontend code, including integrating Stripe for payments, Postmark for emails, user management and authentication, Cloudinary for media file uploads, dynamically rendered landing page, blog creation through Django Admin, Google Analytics, Material UI, setting up a PostgreSQL database, and deploying to Render.com. Let's dive in!
Backend Setup
Initial Setup
Create a Project Folder: Start by navigating to your Desktop or preferred directory in your terminal and create a folder named
saas-boilerplate. Then, create a subdirectory namedbackendand navigate into it.cd Desktop mkdir saas-boilerplate cd saas-boilerplate mkdir backend cd backendClone the Boilerplate Repository: Clone the backend boilerplate repository into your
backenddirectory.git clone https://github.com/rcmiskin10/dj_react_saas_backend_render_template.git .Set Up a Virtual Environment: Use
virtualenvto create an isolated Python environment. Activate it and install the project's dependencies.pip install virtualenv python3.8 -m venv env source env/bin/activate pip install -r requirements.txtEnvironmental Variables: Create a
.envfile in yourbackenddirectory. Populate it with the necessary environmental variables provided below:STRIPE_API_TEST_PK=<STRIPE_API_TEST_PK> STRIPE_API_TEST_SK=<STRIPE_API_TEST_SK> STRIPE_LIVE_MODE=False PROD_BACKEND_URL=<PROD_BACKEND_URL> PROD_FRONTEND_URL=<PROD_FRONTEND_URL> BACKEND_URL=http://127.0.0.1 FRONTEND_URL=http://localhost:3000 DEBUG=True DEV_EMAIL_HOST_USER=<DEV_EMAIL_HOST_USER> DEV_EMAIL_HOST_PASSWORD=<DEV_EMAIL_HOST_PASSWORD> POSTMARK_SERVER_TOKEN=<POSTMARK_SERVER_TOKEN> DEFAULT_FROM_EMAIL=<DEFAULT_FROM_EMAIL>
Now you need to set up Stripe.
If you do not have a stripe account register a free one here: https://dashboard.stripe.com/register. If you do have a stripe account login here: https://dashboard.stripe.com/login.
Once account is set up or you're logged in, turn on `Test Mode` (Toggle button in top right corner of dashboard) it should bring you to: https://dashboard.stripe.com/test/payments
Go to https://dashboard.stripe.com/test/apikeys
Grab your `Publishable key` token and set the environmental variable `STRIPE_API_TEST_PK` in your `.env` file created above.
Next grab your `Secret key` token and set the environmental variable `STRIPE_API_TEST_SK` in your `.env` file created from above.
Next go to Stripe Products to add your products, i.e. subscription tiers
Add as many tiers as you want i.e.
Free w/ a description and price: $0
Pro w/ a description and price: say $10
Make sure both are Recurring and Monthly or however you would like to set up your subscriptions.
Postgres Database Setup: Download and install PostgreSQL. You can use this download link. Once installed, create a database named
postgresand ensure yoursettings.pyreflects the correct database settings. For example:default="postgresql://postgres:postgres@localhost/postgres", if your database name ispostgres.Apply migrations and create a superuser for Django admin access.
 python manage.py migrate
 python manage.py createsuperuser
Running the Server: Start your Django server and log into the admin panel to verify that everything is set up correctly.
python manage.py runserver
Integrating Stripe Products and Prices, Email, and Landing Page data
Add Products and Prices: Navigate to the Django admin payments section to add Stripe products and their prices. Ensure each product in Django matches its counterpart in Stripe, including the recurring intervals and price IDs.
You can find Stripe Product Id in stripe products and click on product and in the URL you will see an ID with prefix
prod_xxxxxxxxand letters and numbers as the unique id.Do the same for all products
Now go to Django Admin Product Price
Add the price for each product from Stripe here: Django Admin Add Product Link
Select
Productthat you added to Django Admin.Add the Price from what you entered on Stripe. Add the interval, i.e. Monthly
Add the stripe price id
Go to https://dashboard.stripe.com/test/products?active=true
- Select the Product and scroll down to
Pricingand look underAPI IDand copy id with prefix and numbers/letters likeprice_xxxxxxxxxand paste into stripe price id on django admin. 5. Do for all products
- Select the Product and scroll down to
Now you can add descriptions of the tiers here: Django Admin Add Product Description Link
- Add as many description list items for each product
Email Setup: Configure your development email settings by adding
DEV_EMAIL_HOST_USERandDEV_EMAIL_HOST_PASSWORDto your.envfile, using an app password generated from your Gmail account.Set
DEV_EMAIL_HOST_USERto yourgmailfor DEV testingSet your
DEV_EMAIL_HOST_PASSWORDto the password set up in your gmail account from above. You need to create an App Password in: https://myaccount.google.com/securityMake sure 2-Step Authentication is enabled.
Then go to https://myaccount.google.com/apppasswords and create a new app and a new password will be created.
Now Emails will be sent through gmail smtp in DEV
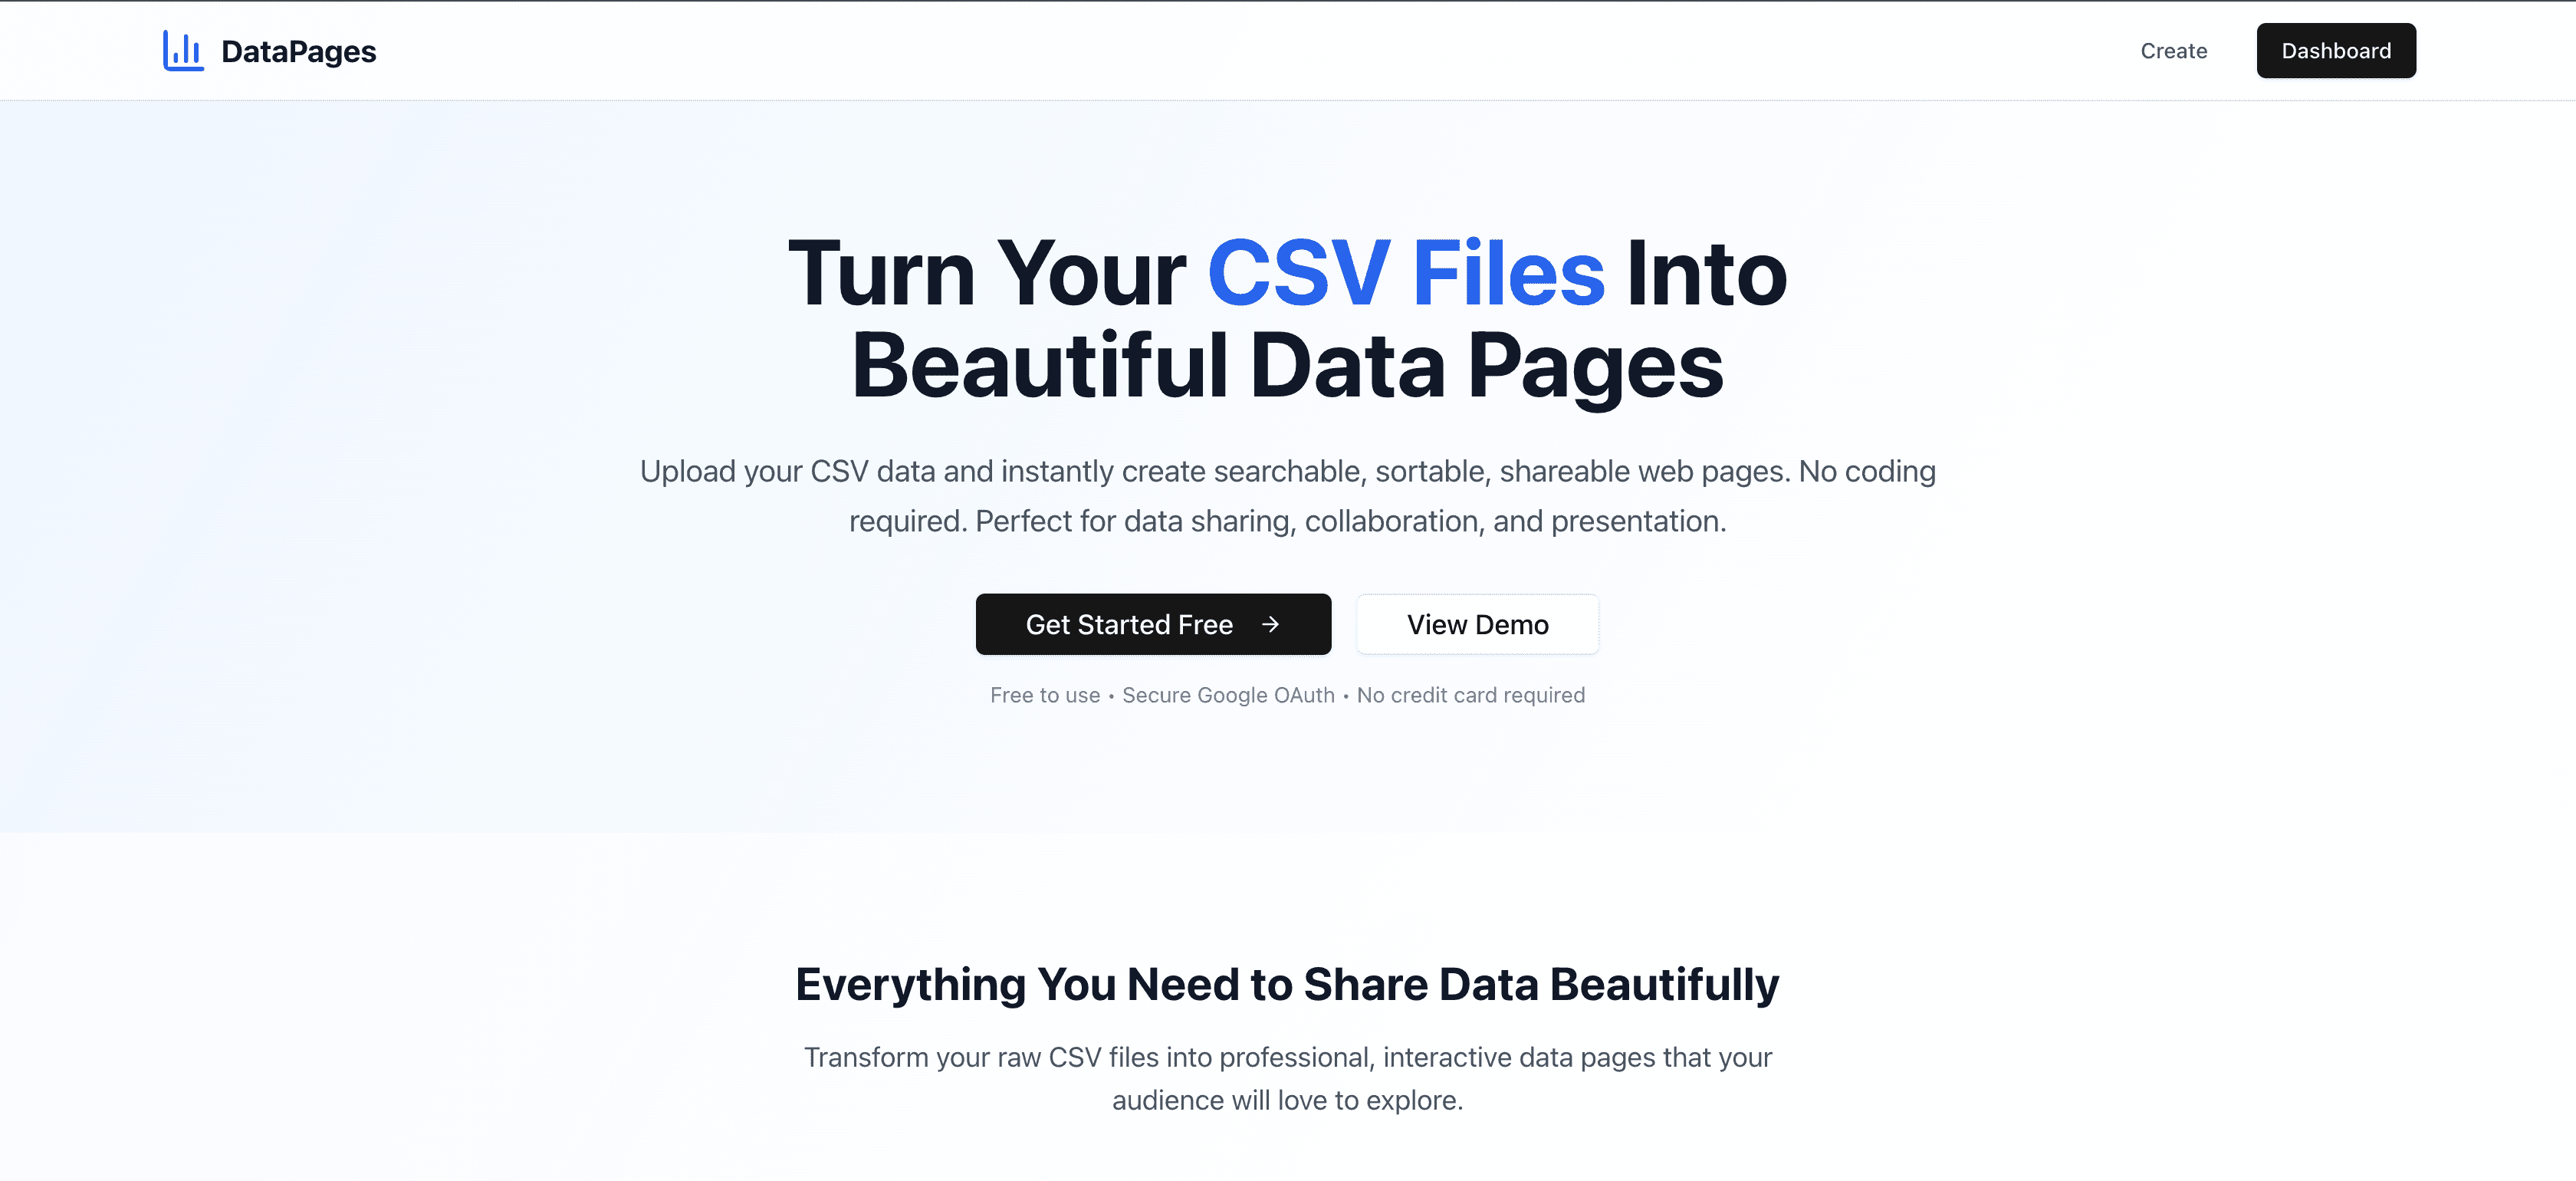
Next up is setting up the landing page data.
Note here you can add whatever copy, images, icons, you would like through the Django admin
Go to http://127.0.0.1:8000/admin/landingpage/landingpage/add/
Add the hero section copy and image
Add the features of your SaaS
the
Feature mui icon name:can be selected from https://mui.com/material-ui/material-icons/?query i.e. findAddand get the name of the icon from the end of the import in the modalimport AddIcon from '@mui/icons-material/Add';i.e.AddYou can add as many features as you like and
Orderthem however you like by applying1,2,3...to each feature. i.e. 1 will be first in line.Do the same for how it works, Secondary hero, and Social Media Links
We will set up prod environmental variables later.
Frontend Setup
Setting Up the Frontend: In a new terminal, navigate to your project root and set up the frontend directory by cloning the frontend boilerplate repository. Install dependencies with
npm install.mkdir frontend cd frontend git clone https://github.com/rcmiskin10/dj_react_saas_frontend_render_template.git . npm installConfigure Environment Variables: Create a
.envfile in yourfrontenddirectory. Add your Stripe Publishable key and Google Analytics ID.Add the publishable key from Stripe to the environmental variable
REACT_APP_STRIPE_API_TEST_PKwith the value fromSTRIPE_API_TEST_PKinbackend/.envNow add an environmental variable
REACT_APP_GA_IDfor Google AnalyticsGo to https://analytics.google.com/
Add an analytics account
Add an app
Go to top search bar and search for
MEASUREMENT IDinData Streamsand copy the ID that has prefixG-XXXXXXXX4. Past thatG-XXXXXXXXas value for environmental variableREACT_APP_GA_IDinfrontend/.env
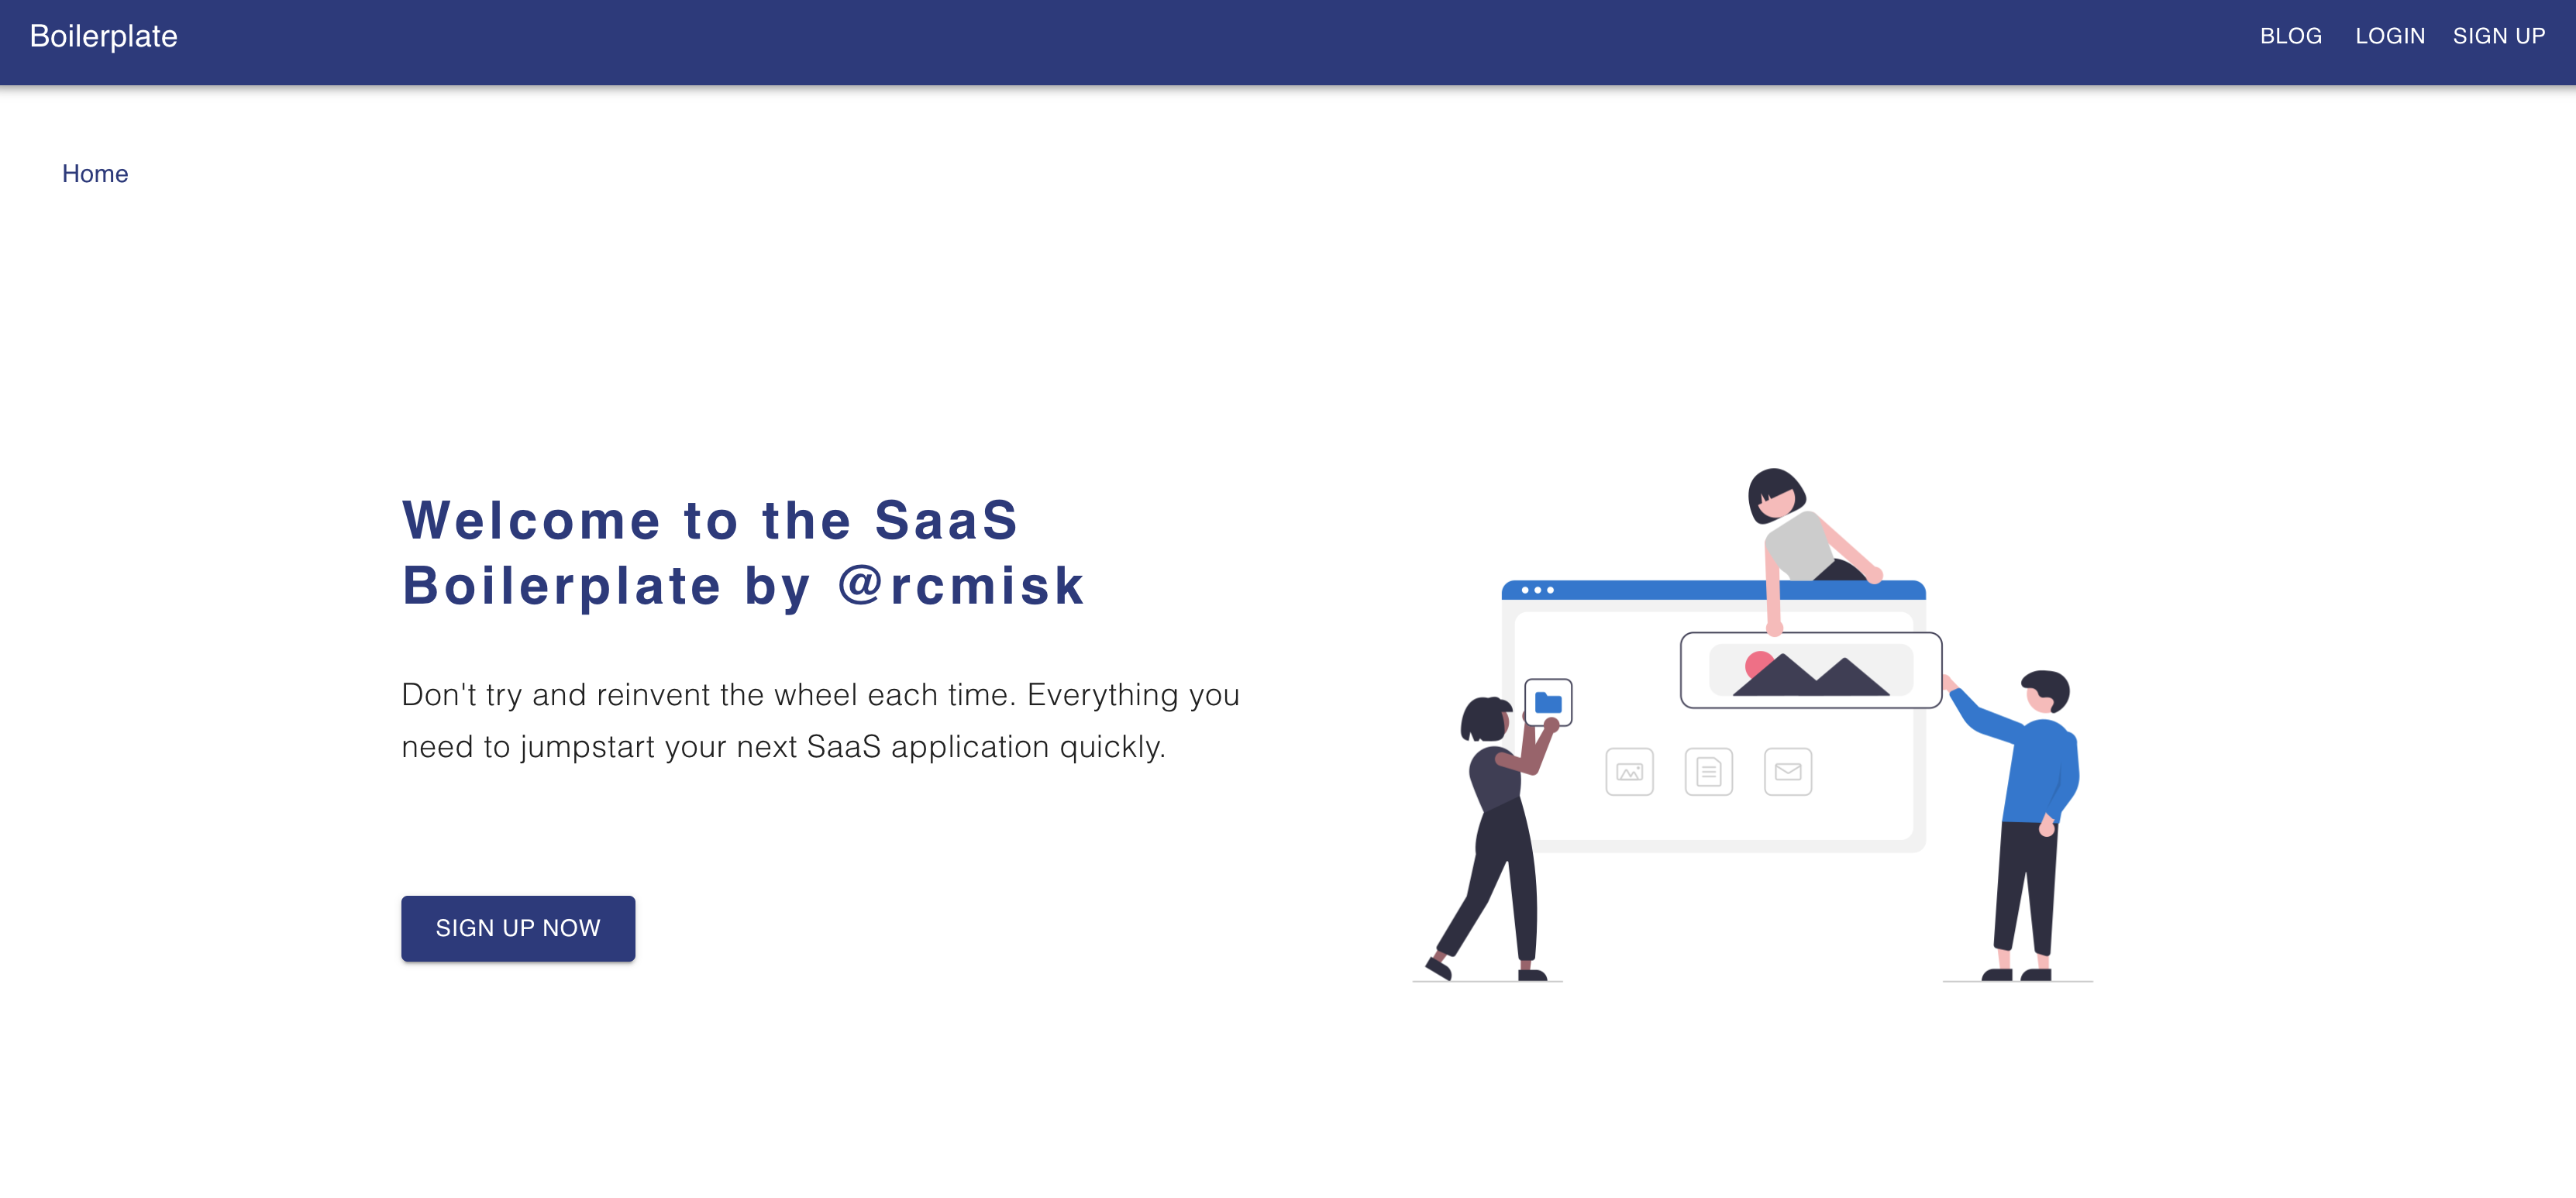
Start the Frontend Server: Run
npm startto launch your React app. Your SaaS landing page should now be visible athttp://localhost:3000/.
Deploying toRender.com
Prepare for Deployment: Ensure your backend and frontend folders are pushed to separate GitHub repositories.
Deploying the Backend: Follow Render.com's documentation to deploy your Django app, adding the necessary environment variables for production, including Stripe keys, Cloudinary for media files, and email settings via Postmark.
Follow tutorial here: https://docs.render.com/deploy-django#use-renderyaml-for-deploys
The
backend/render.yamlalready exists in the saas boilerplate. You can change all the names to fit whatever you like, but our boilerplate named everythingbackendIn the Render Dashboard, go to the Blueprints page and click New Blueprint Instance.
Make sure to first create a repository to hold your
backend/folder on github.Now you can select the repository that contains your blueprint and click Connect.
Give your blueprint project a name and click Apply.
Now add the Production Environmental Variables by clicking the
backendapp and going toEnvironmentAdd you Stripe
STRIPE_API_TEST_PKfound in your local.envfile or if you are ready to use live Stripe data use the Production PK found in stripe dashboard.Same with the
STRIPE_API_TEST_SKSTRIPE_LIVE_MODE=FalseBACKEND_URLwill be the url that your backend render app is pointing to: something similar to thisbackend-xxxxonrender.comFor your media files first set up Cloudinary account by going to the cloudinary website and create a free cloudinary account. After your account has been created, go to the dashboard page and copy the cloud name, api key and api secret.
Add the cloud name to
CLOUDINARY_CLOUD_NAMEAdd the api key to
CLOUDINARY_API_KEYAdd the api secret to
CLOUDINARY_API_SECRET
For your emails create a postmark account here https://postmarkapp.com/. Follow instructions here: https://postmarkapp.com/support/article/1008-what-are-the-account-and-server-api-tokens to find your Server API Token and set it to
POSTMARK_SERVER_TOKEN- Set
DEFAULT_FROM_EMAILto your email with postmark.
- Set
After you deploy the frontend app below, come back to setting
FRONTEND_URLFinally run
pythonmanage.pycreatesuperuserin the Render shell in the settings of the backend app so that you can create an admin account.- To see your backend admin page, go to
<YOUR_APP_URL>/adminto login.
- To see your backend admin page, go to
Deploying the Frontend: Deploy your React app on Render.com, setting environment variables for connecting to the backend API, Stripe, Cloudinary, and Google Analytics.
Connect your github account here: https://dashboard.render.com/select-repo?type=static
Follow the instructions to deploy
Once deployed go to settings for frontend app
In Redirect/Rewrite rules add:
/*as Source/index.htmlas DestinationAnd
Rewriteas Action
Now go to
Environmentand add:REACT_APP_STRIPE_API_TEST_PKto same Stripe API Key that you set in backendAdd
REACT_APP_BACKEND_API_URLand use the backend url from above after backend was deployedAdd your
REACT_APP_MEDIA_URLto the Cloudinary url. Something like thishttps://res.cloudinary.com/xxxxxxx/image/upload/v1/Thexxxxxxxshould be found in your cloudinary dashboard that you used in backend set up.Now add
REACT_APP_GA_IDfrom your .envREACT_APP_GA_IDin local file.Finally take the Frontend url from the react frontend app and set it in the
backend appon render.com's environmental variableFRONTEND_URLthat you previously set up.
FinalAdjustments: After deploying both frontend and backend, ensure all environment variables are correctly set and pointing to the right services. Test your live application to ensure everything works seamlessly.
Congratulations! You've successfully set up and deployed your SaaS boilerplate application. This setup provides a solid foundation for developing your SaaS product, with scalable options for payment processing, database management, and deployment strategies. Happy coding!
Coming soon!
Deploy to GCP Cloud Run w/ React inside Django's static files!
Automate all steps in this blog post, all at the click of button!
Tutorials on the code for both backend and frontend repos!
P.S comment below on any issues!
Sign up for my newsletter to hear about my #buildinpublic journey!